Showing posts with label Nut Free. Show all posts

16 June 2013

Winter warmers - Beef Cheeks Ragu

I love Twitter and the little community of friends I have made. Although I'm not a die hard twitterer, I still like to pop on and see the latest news my new mates are up to, follow a few organisations that I love and shout out for advice if needed.

My beloved and I were hosting his family for dinner last night. It was going to be a cold night (yes, even for Brisbane for those of you sniggering that we don't know anything about the cold) and a cold night for us in our little Queenslander equates to a bloody cold night. Similar to living in a tent, but safer if it rained…just.

To compensate for the ice-box living quarters, I wanted my in-laws to fill there bellies with tasty warm food. I felt a tasty ragu would do the trick.

Enter Twitter.

I sent out a tweet asking if anyone had a tasty ragu recipe. The lovely @melkettle came back promptly with a yes, followed by a photo of a recipe from the OzHarvest book (a fantastic organisation that distributes excess food to charities):

Ragu recipe from the OzHarvest cook book.
As I have a love of slow cooked beef cheeks - you can find my other recipe here - and I needed to make it for 8 people, a little ingredient substituting was in order.

This recipe was so tasty and easy to have bubbling away until my guests arrived. All I need to do was cook the pasta on their arrival.

Beef Cheeks Ragu
Adapted from the OzHarvest cook book
serves 10 (easily)


Beef cheeks and porcini mushroom ragu

Ingredients
50g butter
olive oil
100g speck, cut into small batons
2 onions, finely chopped
8 garlic cloves, chopped
300g swiss brown mushrooms, finely chopped
60g dried porcini mushrooms, soaked in water for about 10 mins then chopped
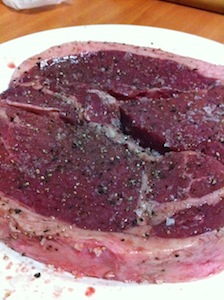
1 to 1.2 kg beef cheeks, cut each cheek into about 3 or 4 pieces
8 vine-ripend tomatoes, roughly chopped, juices saved
1litre of beef stock
3 bay leaves
leaves from a few sprigs of thyme
2 x 500g packets of linguini (or your pasta of choice)

Method
Melt the butter with a good couple of glugs of olive oil in a deep frying pan - I used my dutch oven - and cook speck for a few minutes. Add the onion and garlic and fry gently until soft. Add the mushrooms and porcini and cook for about 5 minutes, or until they have released their juices and these have been reabsorbed. Remove from pan.

Without washing the pan, return it to the heat and add another good glug of olive oil. When it starts to shimmer (just before smoking point) add the beef cheeks. You might need to do this in a few lots for this portion sizing. I had to do it in 3 lots. Fry them until they are brown. Add all beef cheeks back into pan and add the mushroom mix, stir. Then add the tomatoes with their juices, stock and bay leaves. Bring to a boil and then gently simmer for 4 hours with no lid on.

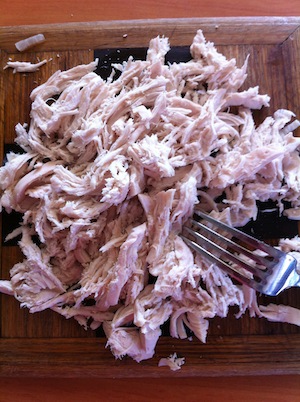
After 4 hours - or until the cheeks are very easy to pull apart - remove the beef cheeks form the pan and shred the meat by using a fork. No need to be perfect here, just get in and shred away. Return shredded meat to pan. At this point taste the dish and season. I cooked for another 2 hours with the lid on. This isn't necessary, but my guests weren't coming for a while so I thought I would just leave everything to bubble away on the lowest my stove could go until they arrived. Also, if you prefer and less 'saucy' sauce, keep the lid off so you can steam off the liquid.

I served this with some rustic country style bread from my local bakery and a simple salad of rocket, pear, parmesan, a splash of balsamic vinegar and olive oil with a little salt and pepper.

I will certainly be making it again.

Beef cheeks ragu, served with a rocket salad
and rustic country style bread


20 September 2012

Chicken and corn soup - good for the soul

I've had a wee bit of the sniffles here in The Self-Raising Kitchen.

Whenever I get sick I crave my brother-in-law's chicken and corn soup with loads of ginger. It's warming for your tummy and good for your soul.

Chicken and corn soup


I normally make this soup using chicken drumsticks. Once cooked I discard the bones and skin - they add wonderful flavour to the soup - and tear up the meat.

Shred your chicken by using a fork

Today I only had one chicken breast in my freezer and it's just too hard to get in the car to go to the shops for a couple of chicken drumsticks. I have a cold after all.

My original notes for the chicken and corn recipe as told to
me over the phone from my brother-in-law about 8 years ago.

This recipe is perfectly simple to cook when you're not feeling on top of the world. It is also full of flavour when you need something comforting, other than tissues and a pillow.

Chicken and corn soup
by my BIL (brother-in-law)
Serves 2

Chicken and corn soup
I normally follow my nose when it comes to the ingredient amounts for this recipe. However, I've measured out what I was putting in the pot today so feel free to add more or less of things as you like.

Ingredients
230g chicken breast (or 3 to 4 chicken drumsticks)
30g ginger, roughly sliced
1 small onion, sliced
800ml water
200g creamed corn
2 heaped tsp cornflour
1 egg
3 spring onions, finely chopped
Salt

Method
Place water, whole chicken breast, ginger, onion and a good pinch of salt in a pot. Cook on high until boiling and then simmer for about 1 hour or until the onions are really soft.

Pull chicken out and shred. Return back to soup and add creamed corn. Return to the boil.

Dissolve cornflour in a little cold water and add to the soup to thicken.

Whisk egg lightly in bowl until just combined. To add the egg to the soup, first start whisking the soup and then slowly pour the egg into the spot you are whisking. This should give you small shreds of egg in your soup.

Take the soup off the element and add the chopped spring onions.

Serve and enjoy!

22 August 2012

Cooking for a crowd and chocolate mousse

I get a warm fuzzy feeling in my stomach when I can provide loved ones with a tasty meal. You see, I'm slack most of the time. I'm terrible at keeping in touch with friends, my housekeeping skills are appalling, my organisational skills are 'interesting', my financial prowess is non-existant, but, I can cook. And, I think most importantly, I love it!

So when a dear friend of mine and my beloved invited us to a little soiree at his apartment for his birthday, I jumped at the chance to cook for his guests.

Dupree, as he likes to call himself and which I blogged about here, or as he is more widely known, Jamie, provides a great deal of support and friendship to my beloved, so the way I know how to show gratitude for this friendship is to cook.

And cook I did. For 25 people in fact. Arghhhhhh! This was honestly the most challenging cooking experience I've had to date. But I took the bull by the horns, got my organisational skills polished, got my head focused and did it.

The menu consisted of:

Asian style pork meatballs (GF)
Beef Rendang (GF)

Chilli con carne (GF)
Chicken and prawn wontons
Chocolate mousse shots with a blueberry flower on top (GF)
A number of the guests at the party were gluten intolerant, so after a little recipe tweaking, they were easy to accommodate and able to partake in all that I made, apart from the wontons.

As you can see from the food it was a carnivore's paradise. 

I used 3kg beef mince, 3kg chuck steak, 1.5kg chicken,
1kg pork mince, 8 chorizos, and 200g prawns
If you would like to cook up your own party storm here are some links:
  • Asian pork meatballs - I used this recipe from taste.com.au. To make it GF substitute the plain flour for GF breadcrumbs (in a food processor finely chop stale GF bread to make this), and ensure you use GF soy and oyster sauce (both are easily available in supermarkets).
  • Beef rendang - I used this recipe from Gourmet Traveller. I substituted the beef oyster blade with chuck steak (just make sure you give it plenty of time to cook so it is tender) and if you can't find galangal, replace it with ginger.
  • Chilli con carne - I used this fabulous recipe from an awesome site called The Self-Raising Kitchen. 
  • Chicken and prawn wontons - I'm afraid you will have to wait for another post on this one, as it is a secret recipe from my brother-in-law.
  • Chocolate mousse - I am going to share the recipe with you below. It is from the Edmonds Cookery Book. If you are from New Zealand you will recognise the name. Basically, every Kiwi household owns this fabulous book, which was first published in 1908 and gives you simple, everyday recipes and cooking tips. My dad is a Kiwi, hence why my whole family are proud owners of this great book. In fact my mum's Edmonds book would be about 40 years old now and is well loved. I hope you enjoy this very simple and very yummy chocolate mousse recipe.

Chocolate Mousse
by Edmonds Cookery Book
serves 4-6

Deliciously light and fluffy chocolate mousse
Ingredients
150g cooking chocolate (I use dark)
4 eggs, separated
300ml cream
2tbls sugar
grated chocolate
blueberries

Method
Break chocolate into the top of a double boiler, Stir over hot water (not too hot or you will ruin your chocolate) until chocolate has melted. Allow to cool slightly. Stir yolks into chocolate. Beat until thick and smooth.

Beat cream until think. Quickly fold chocolate mixture into cream.

Whisk egg whites until stiff but not dry. Gradually add sugar, whisking until think and glossy.

Fold half egg white mixture into chocolate mixture until well mixed. Repeat with remaining egg white mixture. Pour into your individual ramekins or one large one or shot glasses as I used for a cocktail dinner. Decorate with grated chocolate and some extra whipped cream, or simply cut a blueberry into quarters, but not to the very bottom, and open it out to look like a flower like I've done.

*Tip - I used my food processor, blender and hand blender to do all the different steps so you can get it done quickly and don't have to waste time washing in between steps. Whatever you do, if you choose to only use one blender, don't leave your egg whites sitting around. They will separate and you will have watery stuff left at the bottom. Also, when you are folding the egg whites into the chocolate mixture, be gentle, as you want your mousse to be lovely and light so don't knock the good work you put into it when whisking.

Enjoy!

07 August 2012

Beating the chill with homemade baked beans

A delicious old favourite that comes from a pot and not just a can.


Warming, comforting and tasty homemade backed beans

While the northern hemisphere is enjoying their time in the sun, the southern hemisphere is suffering through the cold. Granted, I live in Brisbane, therefore our winter is really quite pathetic. If we have a day where the temperature is below 20 degrees, we think we're about to hit another ice age and hibernation is the only way we'll survive.

Although I do defend our winters by saying that our evenings can get rather chilly, thus making the mornings ridiculously unwelcoming; especially when you are living in an old wooden Queenslander cottage breathing steam from your mouth while you are still inside the house. Brrrrrr!

I can think of nothing better during these cold winter evenings than a glass of red wine - oh who am I kidding, I mean a bottle - and something comforting in my belly to warm me up while living in my ice box.

Nothing like a bottle of red to keep you warm during a
cold winter evening


Homemade Baked Beans
Adapted from Delicous. magazine, July 2012 edition


Ingredients
2 x 400g can cannellini beans
1 onion, olive oil
5 garlic cloves, finely chopped
2 tsp thyme leaves
1 tbs wholegrain mustard
1 tbs brown sugar
1/4 cup worcestershire sauce
1 tbs cumin powder
2 tsp coriander powder
400g can chopped tomatoes
2 tbs tomato paste
600ml vegetable (or chicken) stock
Olive oil
Salt and pepper
Parsley, chopped, toast/bread and butter for serving

Method
Heat olive oil in a pan over a medium heat. Cook onion, garlic and thyme, stirring, for 2-3 minutes until softened. Add in spices (cumin and coriander), cook for 1 minute.

Onion, garlic, thyme, cumin and coriander cooking.
The smell is heavenly.
Drain beans and add to pan with mustard, sugar, worcestershire sauce, tomatoes, tomato paste, stock and a little salt and pepper.

Not terribly enticing at this stage but be patient, it is worth it.

Bring to a simmer, stirring occasionally, and cook for about 45 minutes or until most of the liquid has gone. Check the flavour and add more salt and pepper if needed.

I will include a note here for the carnivorous folk here, i.e. me, I also chop and add two Kransky sausages to the beans. What can I say, it's the German coming out in me.

This is what your beans will look like after about
45 minutes of cooking (with sausages for the non-vegetarians among us)
Prepare your fresh bread or get your toast toasting. Ensure you have your wine topped and get ready to tuck into the tastiest and most warming homemade baked beans recipe you will find. I think it's my beloved's new favourite meal, closely followed by chilli con carne.


Enjoy!


12 June 2012

Tasty comfort food - chilli con carne

There were recipes everywhere. In the kitchen, in the dining room, in the study. They were in the shape of computer printouts, recipe postcards, ripped out of magazines, ripped out of newspapers. I was drowning in recipes. Recipes for chilli con carne.

My beloved loves chilli con carne, very closely followed by the joy of collecting chilli con carne recipes.

I had finally reached my limit of finding Nick's various hordes of chilli recipes and decided, unlike my beloved, to actually cook one. It was for our housewarming. It was winter. How warming can you get than a big bowl full of steaming hot chilli goodness? Obviously not much because my guests chowed in to the chilli before it had even finished cooking. That was 12 months ago.

Dear friends, I now share this yummy recipe of heart stopping tastiness so you too can indulge your inner Mexican when your fancy takes you.

There is nothing like a bowl of steaming hot chilli con carne
to keep you warm in winter, or to enjoy by the pool with a
margarita in summer. It just works all year round.

Chilli Con Carne
SRKitchen adaption from Gourmet Traveller

400g canned kidney beans
olive oil
1kg minced beef
2 chorizo, cut into 1cm cubes
1 onion, finely diced
2 cloves garlic, finely chopped
1-2 fresh green jalapeños, thinly sliced (see note)
500 ml beef consommé (you can substitute for stock, but the consommé will add an extra richness)
400g canned tomatoes
50g good quality dark chocolate (70% cocoa solids), coarsely chopped
¼ cup worcestershire sauce
½ cup red wine
2 tbsp dried oregano
1 cinnamon quill
1 tbsp coriander seeds, toasted and finely ground
3 tsp cumin seeds, toasted and finely ground
1 tsp cayenne pepper
To taste: ground chilli powder
To serve: corn chips, sour cream, coriander leaves and lime wedges    

*Note: Jalapeños are a small, hot green chilli (which I’m lucking enough to be growing in my garden). If unavailable, substitute with other hot chillies.

Chilli con carne ingredients
Heat a splash of olive oil in a large heavy-based saucepan over medium heat and cook mince, breaking up with the back of a spoon, for 5 minutes or until brown, transfer to a plate.

Add chorizo to saucepan and cook for 2 minutes or until starting to brown, using a slotted spoon transfer to a plate.

There should be enough oil in the saucepan to cook the onions, garlic and jalapeños for 5 minutes or until soft. Add the freshly ground coriander and cumin seeds, and cayenne pepper until fragrant.

Return meat to pan with stock, tomatoes, beans, chocolate, cinnamon quill, Worcestershire sauce, red wine and oregano, season to taste with sea salt, freshly ground black pepper and ground chilli.

How your chilli will look once all ingredients have been added
Bring to the boil, reduce heat and simmer for 1 hour, stirring occasionally, or until sauce is thick. Adjust seasoning and chilli heat to taste.

How it should look before you are ready to serve
Scatter chilli con carne with coriander, and serve with corn chips, sour cream and lime wedges to the side.

Chilli con carne goodness.
Enjoy!


22 May 2012

Turkish Sausage Rolls & Red Velvet Cheesecake Brownie

Once upon a time, not that long ago, I was considered one of the most technologically inept persons around.

From the days when I couldn't work out how to get photos off my digital camera, to absolutely despising getting a new phone because I would have to learn (once again) how to do the most simplest of tasks (like ring someone). I would wait for the very last spark of life from the thing before I would relent and reluctantly walk - with the fear of new technology weighing upon my shoulders - into a phone shop.

But now, my dear friends, I'm a technological Goddess. Okay, I exaggerate but I have improved. A necessity when I ventured into the virtual world of the blog.

Not only have I had to grapple with horrible things like HTML coding and widgets (ekkkk!), but I've also had to learn about the art of food photography. Which, quite frankly, I suck at.

However, I'm not one to give up easily. I'm thoroughly enjoying this little blog world of mine and the fabulous people I'm meeting through it; so I must improve.

I've recently joined Pinterest (you can find me there as The Self-Raising Kitchen) to gain a little inspiration from other people and how they make 'stuff' look amazing. (For the social media virgin: Pinterest is like your old cork board where you once used a drawing pin or thumbtack to pin inspirational photos, articles or pictures on the board. Now it's all online; no hunting for thumbtacks, no pricking yourself while digging around in the bottom of a draw feeling for the tack that you just know is in there.)

Let me share with you my attempts to improve my food photography - all taken on my iPhone - by using applications provided on my Mac and with the thanks to instagram (another very cool photo application that can help filter photos to make them look a little snazzier).

Please, let me know what you think or drop a comment and let me know how I can improve. And for your troubles I've linked to an AMAZING red velvet cheesecake recipe that I found on Pinterest, courtesy of Lick the Spoon blog, followed by a recipe for a Turkish sausage roll that is so delicious and so easy you will undoubtedly knock the socks off your friends at your next afternoon tea.


Once you have made the red velvet brownie mixture
and the cheesecake mixture, separately, place the red velvet
mixture in your tin, then gently place the cheesecake mixture on top

Make sure you leave a little left over red velvet brownie mixture
so you can make beautiful swirls on top.

I used a chopstick and had fun making swirls out of the amazing
red velvet brownie mixture in a backdrop of creamy cheesecake mixture. 


Red velvet cheesecake brownie
thanks to Lick the Spoon blog


Turkish sausage rolls
by delicious. magazine, March edition


Turkish sausage rolls, drizzled with pomegranate molasses
Ingredients
500g lean lamb mince
2 garlic cloves, crushed
1 tsp ground cumin seeds
1/4 tsp ground nutmeg
1/4 tsp ground cinnamon
1/2 tsp chilli flakes
1 tsp sweet paprika
1/2 tsp ground coriander
1 tsp dried mint
1 tsp dried oregano
2 sheets frozen puff pastry, thawed
1 egg yolk
1/2 tsp sumac
*Pomegranate molasses, to drizzle

*Pomegranate molasses is available from delis and Middle Eastern food shops. Some IGAs (Greenslopes, Brisbane) also stock it. Don't want to buy it for one dish? Then try my tasty duck recipe that uses it, too.


Method
Preheat the oven to 200°C. 

Combine lamb, garlic, spices and herbs in a bowl and season. I simply cut the pastry sheets in half to make up a sausage roll. Divide filling between the pastry, shaping it into a log along one side. Roll up to form a roll, brush pastry edge with water (if needed, I found it stuck together without the water) and press to seal. 

Rolling up the sausage roll. You can see where I cut
the pastry to make up one roll.

Brush with egg and sprinkle with sumac. Place, seam-side down, on a baking tray and bake for 20-25 minutes until golden.

Sausage rolls ready for the oven. I scored the pastry
for ease in cutting once cooked.

Once cooked, slice, then drizzle molasses over the sausage rolls. No tomato sauce is needed with this sausage roll.

Turkish sausage rolls - so simple, so yummy!

Thanks, once again, for joining me on my technological and cooking adventures.

01 April 2012

A cheeky piece of beef

My first beef cheek experience was at Spanish restaurant, Ole, at South Bank in Brisbane. It was the most tender, melt in your mouth piece of meat I'd eaten in a long time.

I already had this cut of meat in my freezer and I've been wanting to cook it up for a while now. I finally got my act together and found a recipe in my copy of the 2011 Collector's Edition of Gourmet Traveller.

What I liked about this recipe was its use of simple, yet tasty ingredients. The next best thing was the price of beef cheeks. They are cheap. I got mine (500g) for under AUD$3 just from a regular supermarket. I think that is a bit of a bargain, myself. However, you may not always find them, so it would be worth talking to your butcher and even ordering them, if need be.

Treat your cheek like chuck steak; you need to put the time into cooking them to reap the delicious reward of this tender, tasty bit of cheekiness.

Slow cooked beef cheeks
by 2011 Collector's Edition, Gourmet Traveller
Serves 4

Slow cooked beef cheeks on
cauliflower puree and beans.
(no food photography award will be handed to me anytime soon)

Ingredients
2 tbsp olive oil
4 beef cheeks (about 250g each) - (I was only cooking for two and had a 500g cheek)
3 onions, halved, thinly sliced lengthways
3 garlic cloves, thinly sliced
2 fresh bay leaves
3 thyme sprigs (I also added a sprig of rosemary)
375 ml good quality red wine
125 ml (half cup) beef stock (I used beef consomme to give it a richer flavour)

Please note: I ended up using 500ml of stock -- and I was only cooking half the amount of meat -- due to my very uncooperative oven. I suggest you have more liquid on hand (even just water would do) and keep checking the beef during the 3 hour cooking process. If the dish is drying out (as mine kept doing) add more liquid.

The deliciously simple ingredients
that go into this dish


Method
Preheat oven to 150C. Heat oil in a flameproof casserole dish large enough to fit beef cheeks in. Add cheeks, cook over high heat until browned (3-5 minutes each side), then transfer to a plate.

My sealed beef cheek

Add onion and garlic to casserole dish and stir occasionally over a low heat until starting to caramelise (8-10 minutes). Return cheeks to casserole dish, add herbs, red wine and stock, season to taste, then bring to the simmer.

The beef cheek in the boiling braising
liquid before its transfer to the oven. 
Cover and transfer the dish to the oven. Cook until beef cheeks are tender (3-3.5 hours).

I served mine with pureed cauliflower and green beans.

-recipe end-

I have fallen in love with beef cheeks and will certainly be cooking them again.

08 February 2012

Easy meals - Rump steak with balsamic & tomato salad

I like nothing better than going to farmers markets. I love slowly walking around, observing, smelling and focusing on nothing but the food and what I can make with it.

However, I have one little tiny problem with many farmers markets, and that is getting up early on a weekend to go to them. Well actually I have a problem getting up early anytime, let alone on a weekend, which is sacred. But lucky for me the wonderful Jan Power's Farmers Markets are on in Brisbane CBD every Wednesday…ALL day. Perfect!

Fresh produce from the Jan Power's Farmers Markets,
Brisbane CBD

Today at the markets I found a great little stall selling beautiful looking red and yellow grape tomatoes along with a variety I've never seen before, plum tomatoes.


The larger tomatoes are plum tomatoes.
They have a very subtle but sweet taste.

When you have beautiful tomatoes like these, they must become a feature of the meal. And what goes better with tomatoes than basil. I managed to buy this bunch for $2.


My $2 bunch of fresh basil

I was also very happy to support some of our local farmers and picked up this delicious looking rump steak from Rangeland Quality Meats who have farms in southern and central Queensland.


Rump steak from Rangeland Quality Meats
after a good bit of seasoning


With all this fresh produce a quick and easy meal can be made.

This meal would be great if you had mid-week guests, or you just want to enjoy a healthy, scrumptious meal with your roomy.


Rump steak with balsamic & tomato salad 
by The Self-Raising Kitchen

Rump Steak with balsamic & tomato salad


Ingredients
2 x 200g rump steaks
1 handful of snow peas
2 cups mixed tomatoes, halved
1/4 cup basil leaves, torn
4 tsp balsamic vinegar
1 tsp heaped, wholegrain mustard
extra virgin olive oil
salt & pepper

Method
Generously season your steak.

Blanch snow peas: bring a small saucepan of salted water to the boil. While waiting prepare a bowl of water with ice. Once water has boiled place snow peas in saucepan and cook for 1 minute. Pull snow peas out and place directly into iced water for another 1 minute. Drain.

Halve tomatoes and place in a bowl with torn basil leaves. Add extra virgin olive oil and season to taste. Mix with your hands (washed, of course).

Heat oil in a pan. Cook steak to your liking. Try to limit the turning of your steak as all you will do is ensure the outside is cooked and not allow the heat to go far inside; which is fine if you prefer your steak rare. Once cooked, remove from heat and let the meat rest. This will relax your meat and make it juicy and tender.

While your meat is resting, place snow peas and tomato salad on a plate.

Mix together the wholegrain mustard and balsamic vinegar.

Slice your steak and place on the plate with your snow peas and tomato salad. Drizzle the balsamic and mustard dressing over the steak.


Rump Steak with balsamic & tomato salad

05 February 2012

cont...SRKitchen on tour - Marinated prawn salad with grated coconut

(photo by SRKitchen)

By popular demand to last week's Self-Raising Kitchen On Tour, I'm including the recipe for the marinated prawn salad with grated coconut.

This salad would be the perfect accompaniment to a summer barbecue or to cleanse the palate while partaking in a rich curry. Due to its fresh, vibrant flavours from the lemongrass, mint, coriander, chilli and lime, and the cooling crunchiness of the coconut, this salad promises to be a hit at your next dinner party.

Now, you do need to use a fresh coconut for this dish. Do not be persuaded to use desiccated coconut as it will not provide you with the same moist freshness that a whole one will give you. What I suggest is you find a sucker...I mean a wonderful helper, who will crack the coconut, pull the flesh out and then very patiently grate it. My beloved did this for me before he disappeared from the kitchen, and from yelling distance, so he didn't get roped in to do any more 'special' jobs.

Putting the final touches on the salad.

Marinated prawn salad with grated coconut 
by David Thompson

Ingredients
15 small green prawns, peeled and cleaned
large pinch of palm sugar
1 tbsp fish sauce
1 cup grated coconut
4 red shallots, sliced
2 stalks lemongrass, finely sliced
handful of mixed mint and coriander leaves
3 kaffir lime leaves, finely shredded
1 tbsp julienned long red chilli

Marinade
1 garlic clove, peeled
large pinch of salt
2-5 bird's eye chillies
4 tbsp kaffir lime juice, or regular lime juice with a touch of mandarin juice

Method
To make the marinade, pound together the garlic, salt and chillies using a mortar and pestle until you have a fine paste. Transfer to a large bowl and stir in the lime juice. Add prawns and knead vigorously for several minutes. Leave for a further few minutes until the prawns have cured.

SRKitchen tip - I didn't have particularly small prawns so I cut up what I had into small pieces. As my host was not a fan of raw seafood, I left the pieces of prawns in the marinade for several hours. Remember the lime juice will actually cook the prawns, so you have no need to introduce any heat to this dish…well at least not from a flame, anyway.

Once you are happy with how 'cooked' the prawns are add palm sugar and fish sauce; the marinade should now taste sour, salty, hot and sweet (the four essential elements to Thai food). Work in the coconut. Add remaining ingredients, reserving a little shredded lime leaf and red chilli to garnish (or mint leaves and chilli).

-recipe end-

Give this salad a go, I promise you will love it as much as I do.