Showing posts with label Poultry. Show all posts

11 August 2014

Getting my chop on and Paella

Slicing, dicing, chopping, the rhythm of the repetitive movement so relaxing and the cheapest kind of therapy I can get.

I do it slowly and calmly, winning no races, just chop chop chopping.

I love getting everything prepared so I can just put it all in the pot when it’s needed.

Cooking is such a methodical, organised part of my life when life can be anything but organised and methodical.

This chicken and chorizo paella recipe was perfect for me to get my knife skills in action chopping onions, garlic, capsicum and chorizo. It was also the first time for me to cook paella and I will certainly be making this one again.

Chicken and chorizo paella


Chicken and chorizo paella
Adapted from Jamie Oliver does…

Serves 6-8

Ingredients
Olive oil
2 raw chorizo sausages, thickly sliced
300g cooked chicken, roughly chopped
1 green pepper, deseeded and roughly chopped
1 red pepper, deseeded and roughly chopped
5 cloves of garlic, peeled and roughly chopped
1 onion, peeled and roughly chopped
a small bunch of fresh parsley, leaves picked and roughly chopped, stalks finely chopped
sea salt and freshly ground black pepper
a good pinch of saffron
300g Arborio rice
200g jarred red peppers in oil, drained and roughly chopped
400g can of diced tomatoes
1 litre of chicken or vegetable stock
150g snow peas, sliced thinly at an angle
1 lemon

Method

Heat a large wide-based pan over a medium heat and add a glug of olive oil and the sliced chorizo (if you use uncooked chicken add it to the chorizo). Fry for around 10 minutes, stirring occasionally. As soon as the chorizo starts taking on colour and the fat is beginning to cook out of it, add the chopped peppers, garlic, onion and parsley stalks along with a good pinch of salt and pepper and the saffron. Fry gently for another 10 minutes, or until the vegetables have begun to soften.

Add the rice and jarred peppers and keep stirring for a few minutes until the rice is coated in all the lovely flavours, then pour in the tinned tomatoes and 800ml of stock, seasoning again with salt and pepper. Bring everything to the boil, then turn down to a medium to low heat and stir constantly for about 15 minutes. Make sure the rice doesn’t stick to the bottom of the pan as it absorbs the liquid, so keep stirring.

After 15 minutes the rice should be cooked, but still have a bit of a bite. Add the cooked chicken at this point. You may want to add an extra splash of stock here if the rice looks a bit dry. Keep stirring and cook for another 5 minutes or until chicken heats through. Add your green beans and cook for a further 5 minutes while stirring. Stir in the chopped parsley and the juice from half your lemon. Cut the other half of the lemon into wedges for serving. Enjoy!

21 May 2014

Babysitting and a hearty chicken & quinoa stew

Brisbane is slowly heading into winter. Slowly. I love winter and the reason is twofold. One, I don't have to wade my way through the humidity with clothes sticking to areas of my body that they were never meant to meet. And two, I get to enjoy making - and eating - delicious slow cooked stews and other warm, comforting, not necessarily meant for everyday consumption, food. How can you not like winter in Brisbane?

This change in temperature has prompted me to make my sister's family a hearty chicken and quinoa stew. Simple, healthy and comforting.

So why does my adorable sister and her family get this? For the last few days I've had to move in with them due to my parents having a mini break up at Noosa. So why does this 36 year old need to be babysat by her sister? Basically we all decided, my psychiatrist included, that I tend to go to very dark places when on my own. So, here enters wonderful family and friends who agree to take me in while I find my feet again, and while my poor parents have a break.

The one thing I can do as a thank you is cook a meal. My sister and brother-in-law are flat out with work and looking after their three wonderful daughters, who are 8, 5 and 2. A meal cooked for them all is one less job they need to complete, right? Also, those girls mean everything to me so I'm extremely happy to be with them and helping out (although only in a small way). And the excitement in those girls eyes when I came with my suitcase was quite simply priceless.

This dish is for all you busy people out there. It's so simple and super tasty. Even if you aren't a cook this one is worth a try.

Hearty chicken and quinoa stew

Hearty chicken and quinoa stew
Adapted from Cookin' Canuck
Serves 8

Ingredients
1kg chicken breast
1 onion, diced
4 cloves garlic, diced
4 cups (500ml) chicken stock
400g can diced tomato
700g butternut pumpkin, cubed
1 cup uncooked quinoa, washed
1 tbsp dried mixed herbs
1/2 cup firmly packed, roughly chopped olives
400g can cannellini beans
400g can butter beans
salt and pepper
1/4 cup chopped parsley, leave some for garnish
lemon wedges to serve

Method
Gently fry the onions and garlic together until translucent. Add in the chicken, stock, tomatoes, pumpkin, quinoa and mixed herbs. Bring to the boil and simmer until chicken is cooked through.

Remove chicken and shred. Add back into the stew. Add olives and beans, cook for a further 10 minutes. Turn heat off, add chopped parsley.

Serve with a wedge of lemon and parsley on top.

You don't get much easier than that.

20 September 2012

Chicken and corn soup - good for the soul

I've had a wee bit of the sniffles here in The Self-Raising Kitchen.

Whenever I get sick I crave my brother-in-law's chicken and corn soup with loads of ginger. It's warming for your tummy and good for your soul.

Chicken and corn soup


I normally make this soup using chicken drumsticks. Once cooked I discard the bones and skin - they add wonderful flavour to the soup - and tear up the meat.

Shred your chicken by using a fork

Today I only had one chicken breast in my freezer and it's just too hard to get in the car to go to the shops for a couple of chicken drumsticks. I have a cold after all.

My original notes for the chicken and corn recipe as told to
me over the phone from my brother-in-law about 8 years ago.

This recipe is perfectly simple to cook when you're not feeling on top of the world. It is also full of flavour when you need something comforting, other than tissues and a pillow.

Chicken and corn soup
by my BIL (brother-in-law)
Serves 2

Chicken and corn soup
I normally follow my nose when it comes to the ingredient amounts for this recipe. However, I've measured out what I was putting in the pot today so feel free to add more or less of things as you like.

Ingredients
230g chicken breast (or 3 to 4 chicken drumsticks)
30g ginger, roughly sliced
1 small onion, sliced
800ml water
200g creamed corn
2 heaped tsp cornflour
1 egg
3 spring onions, finely chopped
Salt

Method
Place water, whole chicken breast, ginger, onion and a good pinch of salt in a pot. Cook on high until boiling and then simmer for about 1 hour or until the onions are really soft.

Pull chicken out and shred. Return back to soup and add creamed corn. Return to the boil.

Dissolve cornflour in a little cold water and add to the soup to thicken.

Whisk egg lightly in bowl until just combined. To add the egg to the soup, first start whisking the soup and then slowly pour the egg into the spot you are whisking. This should give you small shreds of egg in your soup.

Take the soup off the element and add the chopped spring onions.

Serve and enjoy!

04 September 2012

Taking thyme out - Chicken & mushrooms in a white wine, thyme & lemon sauce

Fresh herbs add a little dazzle to your mid-week meals


Chicken and mushrooms with a white wine, thyme and lemon sauce

Do you find by the time spring arrives in the southern hemisphere you are left wondering where the year’s gone, why haven’t those new year resolutions been achieved, when did those pants shrink that fitted perfectly last summer and who the hell is that pasty, white faced, black eyed person staring back at you every time you look in the mirror?

You haven’t? Yeah, no, me either *insert sarcastic eyebrow lift here*

While our northern hemisphere friends are getting back into the daily routine of life, after what I hope was a great summer break. Here in the southern hemisphere, it seems that by the time September hits it’s only another hop, skip and a slam dunk before we’re singing Jiggle Bells and Frosty the Snowman while sweating it out in 90 per cent humidity. The absurdity!

Today, I invite you to STOP and smell the herbs and spices, ladies and gentlemen. It doesn’t matter where you are or what season you are in, go out to your herb garden, open your spice draw/container/jar, walk into your local fruit and veg shop and stick your head in a bunch of herbs, close your eyes and breathe in a long deep breath. And now relax. What did you smell? What did it remind you of? What dish did it make you want to eat?

I’m enjoying the smell of thyme. It conjures up memories of Sunday mornings on my deck with the sun dancing on my skin about to tuck into a plate of Swiss brown mushrooms fried in a little butter with fresh sprigs of thyme, laying on a piece of lightly toasted sour dough. Oh, yeah!


One of my favourite herbs, thyme

In honour of both thyme and mushrooms, today I'm sharing a great mid-week evening recipe that, like me, will help you stop, relax and enjoy a wonderful meal at the table with loved ones.
Chicken & mushrooms in a white wine, thyme & lemon sauce
by The Self-Raising Kitchen
serves 4

Chicken and mushrooms with a white wine, thyme and lemon sauce


Ingredients
2 chicken breasts, halved
1 clove garlic, finely chopped
4 sprigs thyme, leaves pulled off stems
250g button mushrooms, halved
zest of half a lemon
juice of half a lemon
olive oil
1/2 cup wine
1/2 chicken stock
Salt and pepper
1tsp cornflour

Method
Pre-heat oven to 180 degrees celsius. Season chicken breasts. In an oven proof dish add garlic, mushrooms, thyme, lemon zest, lemon juice and a glug of olive oil. Add chicken to the dish and mix everything around so the chicken and mushrooms are well coated. Add in the stock and wine. Cook in the oven for 25 minutes.

Chicken and mushrooms ready for the oven 

Once the chicken is cooked, place the chicken breasts and mushrooms on a separate plate, cover with aluminium foil. If you haven't used a dish suitable for a stove top, transfer the remaining liquid into a pan. Place pan on a high element and wait for the liquid to boil. Add a tsp of cornflour to a little cold water and add to boiling liquid. Leave to simmer for 2 minutes. Taste. See if the sauce needs a little more salt or pepper, or just a squeeze of lemon juice. If you feel you need more sauce - although a little goes a long way - simply add more wine, water or stock. Be sure to check the seasoning.


Plate up the chicken and mushrooms with your favourite steamed greens and spoon the white wine sauce over the meat.
___________________________

Such a simple, tasty recipe to enjoy and share with loved ones over a relaxing vino. Yes?

22 August 2012

Cooking for a crowd and chocolate mousse

I get a warm fuzzy feeling in my stomach when I can provide loved ones with a tasty meal. You see, I'm slack most of the time. I'm terrible at keeping in touch with friends, my housekeeping skills are appalling, my organisational skills are 'interesting', my financial prowess is non-existant, but, I can cook. And, I think most importantly, I love it!

So when a dear friend of mine and my beloved invited us to a little soiree at his apartment for his birthday, I jumped at the chance to cook for his guests.

Dupree, as he likes to call himself and which I blogged about here, or as he is more widely known, Jamie, provides a great deal of support and friendship to my beloved, so the way I know how to show gratitude for this friendship is to cook.

And cook I did. For 25 people in fact. Arghhhhhh! This was honestly the most challenging cooking experience I've had to date. But I took the bull by the horns, got my organisational skills polished, got my head focused and did it.

The menu consisted of:

Asian style pork meatballs (GF)
Beef Rendang (GF)

Chilli con carne (GF)
Chicken and prawn wontons
Chocolate mousse shots with a blueberry flower on top (GF)
A number of the guests at the party were gluten intolerant, so after a little recipe tweaking, they were easy to accommodate and able to partake in all that I made, apart from the wontons.

As you can see from the food it was a carnivore's paradise. 

I used 3kg beef mince, 3kg chuck steak, 1.5kg chicken,
1kg pork mince, 8 chorizos, and 200g prawns
If you would like to cook up your own party storm here are some links:
  • Asian pork meatballs - I used this recipe from taste.com.au. To make it GF substitute the plain flour for GF breadcrumbs (in a food processor finely chop stale GF bread to make this), and ensure you use GF soy and oyster sauce (both are easily available in supermarkets).
  • Beef rendang - I used this recipe from Gourmet Traveller. I substituted the beef oyster blade with chuck steak (just make sure you give it plenty of time to cook so it is tender) and if you can't find galangal, replace it with ginger.
  • Chilli con carne - I used this fabulous recipe from an awesome site called The Self-Raising Kitchen. 
  • Chicken and prawn wontons - I'm afraid you will have to wait for another post on this one, as it is a secret recipe from my brother-in-law.
  • Chocolate mousse - I am going to share the recipe with you below. It is from the Edmonds Cookery Book. If you are from New Zealand you will recognise the name. Basically, every Kiwi household owns this fabulous book, which was first published in 1908 and gives you simple, everyday recipes and cooking tips. My dad is a Kiwi, hence why my whole family are proud owners of this great book. In fact my mum's Edmonds book would be about 40 years old now and is well loved. I hope you enjoy this very simple and very yummy chocolate mousse recipe.

Chocolate Mousse
by Edmonds Cookery Book
serves 4-6

Deliciously light and fluffy chocolate mousse
Ingredients
150g cooking chocolate (I use dark)
4 eggs, separated
300ml cream
2tbls sugar
grated chocolate
blueberries

Method
Break chocolate into the top of a double boiler, Stir over hot water (not too hot or you will ruin your chocolate) until chocolate has melted. Allow to cool slightly. Stir yolks into chocolate. Beat until thick and smooth.

Beat cream until think. Quickly fold chocolate mixture into cream.

Whisk egg whites until stiff but not dry. Gradually add sugar, whisking until think and glossy.

Fold half egg white mixture into chocolate mixture until well mixed. Repeat with remaining egg white mixture. Pour into your individual ramekins or one large one or shot glasses as I used for a cocktail dinner. Decorate with grated chocolate and some extra whipped cream, or simply cut a blueberry into quarters, but not to the very bottom, and open it out to look like a flower like I've done.

*Tip - I used my food processor, blender and hand blender to do all the different steps so you can get it done quickly and don't have to waste time washing in between steps. Whatever you do, if you choose to only use one blender, don't leave your egg whites sitting around. They will separate and you will have watery stuff left at the bottom. Also, when you are folding the egg whites into the chocolate mixture, be gentle, as you want your mousse to be lovely and light so don't knock the good work you put into it when whisking.

Enjoy!

25 April 2012

SRKitchen school: A touch of French - Cassoulet

It is warming, comforting, yummy and just a little bit naughty. That is the Cassoulet; a slow cooked casserole from the south of France.


I took great delight in deliciously devouring my first Cassoulet in the beautiful town of Carcassonne, France in 2006.


The beautiful Cité in Carcassonne, France
(photo by SRKitchen, 2006)


I was with my dear friend, Asha, and we'd decided to leave the depressing grey skies of London (where we lived at the time) to enjoy a long weekend in this breathtaking, world heritage listed, fortified walled town -- or Cité -- to enjoy a European winter fairyland.


Asha & I felt like we had stepped onto the set of a
Disney production in Carcassonne, France
(photo by SRKitchen, 2006)


You will find a plethora of cassoulet recipes on the internet, all varying in ingredients and the number of days it can take to make them. Basically, it is a casserole of beans, meats and herbs. 


A connoisseur of the cassoulet, Jean-Claude Rodriguez, describes the cassoulet as a sharing dish. "When a cassoulet arrives at the table, bubbling with aromas, something magical happens -- it's Communion around a dish." I absolutely adore this description. 


Traditional French dish - Cassoulet
(photo by Chris McCurley)


So when Asha asked for her second cooking lesson in The Self-Raising Kitchen, she decided she wanted to try her hand at the Cassoulet; a far cry from her first lesson making the humble omelette.


I don't think I made it easy for Asha, however. I had made cassoulets previously, but this time I wanted to experiment a little with several recipes. I used this one, this one and I had written out a different herb crust topping on my cooking notes, of which I have no recollection where I got it from.


Although the quantities can easily be varied, please note you will need a very large dish for this. We ended up having to take some of the meat and juice out, which I put into a saucepan and left simmering on the stove while the casserole dish cooked in the oven.


Asha did a superb job experimenting with me to make this recipe. We hope you like it.


Cassoulet

by The Self-Raising Kitchen

Serves 10
Serving up the Cassoulet
(photo by Chris McCurley)
Ingredients
2 large brown onions
8 garlic cloves
2/3 cups white beans (cannelini, haricot, butter beans)
400g speck (you can buy speck from most supermarkets in their specialty meat sections)
750g pork belly
1 chicken* (ask your butcher to cut the meat off the frame and keep this to make a stock. Cut up the chicken into palm size portions, where you can.)
3 garlic sausages (if your can't find substitute with pork sausages)
2 rosemary sprigs
4 bay leaves
4 thyme sprigs
1 tin diced tomato (400ml)
375ml white wine
4 cups of good quality (or homemade) chicken stock
salt


*Please note: Traditionally duck is used. If you can't purchase duck, or you're looking for something a little more cost effective, chicken is a great substitute.


Garlic and herb crust ingredients
4 cups fresh breadcrumbs 
1.5 tbsp flat-leaf parsley, chopped
1 garlic clove, finely chopped
50g butter, melted
1 tbsp thyme, chopped


Method
If using dried beans, place in bowl and cover beans with plenty of cold water. Leave over night.


Preheat oven to 140 degrees celsius.  Cut speck into 2cm batons. Cut pork belly into 4cm batons. Heat oil in a large casserole dish over high heat. Cook pork in small portions to allow meat to brown and not broil in its own juices. Set aside. Do this each for the speck, chicken and whole sausages. Cut sausages into quarters.


Add onion and garlic, stirring, for 5 minutes or until soft. Add stock, wine, tomato and herbs to the dish. Add salt to taste. Stir.


Add beans, pork, speck, chicken and sausages. Bake in a preheated oven, covered, for 1.5 hours or until meat is tender.


Towards the end of the 1.5 hours, combine the breadcrumbs, flat-leaf parsley, garlic, thyme and melted butter in a bowl. Ensure breadcrumbs are coated with butter, but not oily. Sprinkle this mixture over the cassoulet and bake, uncovered, for a further 30-40 minutes or until the top is crisp and golden. Remove from the oven and serve with some fresh bread to sop up the juices.


Cassoulet - the sharing dish
(photo by Chris McCurley)


I would like to make a special thank you to Chris McCurley for taking such sensational photos for this post. You are welcome at my house for dinner anytime, Chris.


11 April 2012

Family Fun - Duck Mole Poblano

It was close to midnight. My beloved and I were chatting away (okay, it was me chatting away). Suddenly, like a lightening bolt to a lightening rod, like a positive charge to a negative charge, like a bee to a flower, an idea plunged into my head and the family Easter feast was born.

Without consideration of the hour on my part, texts were sent to my family. With consideration of the hour from my beloved, emails were sent to his family: Family Easter Feast at The Self-Raising Kitchen on Easter Saturday. Bring a dish!

I love a feast.

Family Easter Feast Menu

entree
BBQ baby squid with a Greek salad
(prepared by my sister)

My sister's amazingly tender BBQ baby squid
with a side of Greek salad

main
slow roasted pork belly
roast tomato and bean salad
(prepared by my father)
duck mole poblano
radish salad
(prepared by me)

dessert
triple chocolate trifle
(prepared by my mother-in-law)

My father's most amazing and succulent
slow roasted pork belly

In this post I'm going to share the recipe of the dish I cooked: Duck Mole Poblano courtesy of the April edition of SBS Feast magazine. I chose this dish in honour of chocolate, it was Easter after all, and mole poblano is a Mexican dish that includes chocolate. How could I go past it?

There's a couple of items in this recipe you won't be able to buy at your local grocer. Let me introduce you to my favourite online spice store, Herbies.com.au. This place has everything you could hope to want when it comes to herbs and spices, including wonderful quality and fabulous turnaround times. I made my order late one Monday evening and I had my spices by Wednesday. It is too easy.

Mexican chocolate from the fabulous
herbies.com.au 

Duck Mole Poblano
by the SBS Feast magazine, April 2012 edition
Serves 4

Ingredients
6 dried pasilla chillies or dried ancho chillies, seeded, stems removed (you can buy these from Herbies. I used the ancho chillies (they come in 3 to a pack) as I was cooking for chilli novices and this is a really sweet chilli. In fact, once I had rehydrated the chillies they smelt like prunes to me.)
4 (about 800g) duck breasts, trimmed (this can be substituted with chicken)
1 tbs vegetable oil
500ml (2 cups) chicken stock
2 cloves
1 cinnamon quill
40g Mexican cooking chocolate, chopped
410g can whole tomatoes
chopped coriander leaves and lime wedges, to serve

Ingredients for almond paste
2 tsp vegetable oil
1 small corn tortilla
250ml (1 cup) chicken stock
35g (quarter cup) raisins
40g (quarter cup) blanched almonds, toasted (simply place in a non-stick pan over a low heat until fragrant and lightly brown)
2 tbs pumpkin seeds, toasted (as above)
2 tbs sesame seeds, toasted (as above)
1 tsp ground coriander
2 garlic cloves, quartered

I deseeded my chillies after soaking them,
which was a lot easier.
Method
Soak chillies in 500ml water for 20 mins to soften. Drain, reserving 250ml soaking liquid. Process chillies in a food processor, gradually adding reserved liquid, to form a smooth paste.

Ancho chilli paste

To make almond paste, heat oil in a frying pan over high heat. Add tortilla and cook for 1 minute each side or until lightly golden. Remove from pan and roughly chop, then process in food processor with the remaining ingredients until smooth.

Almond paste

Place duck breasts, skin-side down, in a large frying pan over medium heat. Cook for 8 minutes or until skin is golden. Turn and cook for a further 2 minutes or until lightly browned. Cut into 3 pieces on the diagonal, cover and set aside.

Golden skinned duck breasts

Heat oil in a heavy-based frying pan over medium heat. Add chilli paste and cook, stirring, for 3 minutes or until fragrant. Stir in the almond paste and cook for a further 3 minutes or until slightly reduced. Add chicken stock, cloves, cinnamon, chocolate and tomatoes. Bring to the boil, then reduce heat to low and cook, uncovered, for 20 minutes. Add duck and cook for a further 10 minutes or until sauce has slightly thickened. Season with salt and pepper, scatter with chopped coriander and serve with lime wedges.

Duck mole poblano
(food photography is a skill, a skill I still do not have)


16 February 2012

SRKitchen school: The never fail omelette


The year was 2005. I'd decided to leave my big country town of Brisbane and take up residence in the metropolis of London; where the closest person I knew at the time was living in Windsor (a few hours away on a train). 

So, it was just me, my backpack and 20 million Londoners. Scared? Hell yeah!

Within five days of landing at Heathrow, however I met my other half, Asha. She was (is) also an Australian and had also just arrived in London from Brisbane. The irony! She was effervescent, friendly and just made you want to love life. We became inseparable.

We both went through so many challenges and adventures living there. Some things like homesickness, joblessness, banklessness and shelterlessness was all part of the adventure of living in the UK. Other challenges, like the 2005 London bombs and having an operation to remove a gallbladder, were not quite what we had signed up for. 

But together – along with lots of wine, laughter, tears and hugs – we got through everything that was thrown our way. I can honestly say that I would not have been able to get through what I did there without Asha always by my side and ready to give me a hug and a smile…even if she could/can talk under water with a mouth full of marbles…hehehe (which I can too).

Now Asha has been wanting to improve her cooking skills for a while and asked if I would help her out. How could I refuse. The other day we were heading off to an orchestra concert and Asha had spent the day down the Gold Coast at her friends amazing festival, Bleach* (it's going until Feb 26 so check it out). We therefore needed a quick and easy dinner option. So the omelette - the perfect quick, healthy and yummy option - was the go.

The omelette - bacon, mushroom and cheese

There are so many different ways to make an omelette. This is a never fail way my dad taught me. Feel free to change the ingredients with whatever is in your fridge. That's the best part about omelettes, as long as you have the eggs, the rest you can have fun with. However, if you're a bit nervous, I'll give you some guidelines, but you don't need to be exact, if you like more bacon, put more bacon in it. You can't stuff this up, I promise.  You will NEVER have a scrambled looking omelette again.

Bacon, mushroom and cheese omelette
made by Asha
Ingredients
4 free range eggs (the rule is to allocate 2 eggs per person. You can always add 1 extra for good luck)
1 tbsp finely chopped parsley
1/2 brown onion, chopped
200g bacon, sliced
1 cup mushrooms, sliced
1/2 cup grated cheese (we used mozzarella)
1/4 cup milk
knob of butter
*you need to use a non-stick fry pan for this omelette and a grill.

Method
Heat some oil in a pan and start frying the chopped onions. After about 1 minute add your bacon and mushrooms. Fry until mushrooms have wilted and cooked. Set aside.

Asha chopping the parsley

In a bowl crack the eggs. Add the milk and chopped parsley (or herb of your choice) and whisk gently. Add in the cheese, bacon, onion and mushrooms and give it a quick mix.

Whisking eggs with milk and herbs

Heat up your fry pan again and add the knob of butter. Turn your grill on. Once the pan is hot add your omelette mixture to the pan. You may need to move the ingredients around the pan to make it an even looking omelette. Cook for about 1 to 2 minutes on a medium heat, you don't want that bottom burning.


Adding the mixture to the fry pan

Now this is how you make a never fail omelette. Place the half cooked omelette under your pre-heated grill (with your handle sticking out if it is plastic, like mine). No flipping, no fuss. I normally grill it on high but keep an eye on it. I assure you, the moment you walk away and forget about it…it will burn. Trust me! To test if the omelette is cooked, pull the pan out and tip it to one side. You should not see any movement from the mixture.

The never fail omelette

With this size pan I always cut the omelette in half for two people. Asha and I had ours with a very basic rocket, parmesan cheese and balsamic vinegar salad.


Asha's omelette with a rocket salad

I think you will all agree Asha did a sensational job. And it was delicious, too.

The next morning I made a smoked salmon, feta and spring onion omelette for friends. This one is even easier as you can miss out the first step and just add all the ingredients straight into the egg mixture and cook away. Easy!

Smoked salmon, feta and spring onion
omelette with toasted turkish bread.

What ingredients do you like in your omelette?


06 March 2011

60th celebrations: Char-grilled chicken with corn salad and buttermilk dressing

In between my beloved and I searching for our first house and going through the marathon of getting finance - whoever said buying a house is one of the major stresses in life was spot on, dealing with bankers, brokers, lawyers and real estate agents all at once is not my idea of fun - we managed to hold a 60th celebration for my father.

It was a great evening with family and a few dear family friends. My dad hates fuss, especially when it comes to himself and his birthday. So my sister and I tried to make the evening as fuss free and relaxed as possible.

We started with simple canapes, sparkling wine for the girls and beer for the boys.

Watermelon and feta squares
Homemade walnut crisps with goat's cheese and pear
Artichoke tartlets
Main meal was simply char-grilled chicken - that my beloved kindly cooked on the barbecue for me - and the loveliest salad with char-grilled corn and a winning buttermilk dressing.

Char-grilled chicken
from Gourmet Traveller's Annual Cookbook
I used two whole chickens for 10 people

Char-grilled chicken marinated in lemon, cayenne
pepper, thyme, garlic and white peppercorns
Ingredients
1 chicken (about 1.8kg)
2 tbsp thyme
2 garlic cloves, coarsely chopped
2 tsp white peppercorns
1 tsp cayenne pepper
Finely grated rind and juice of 1 lemon
1/3 cup olive oil
1 bunch spring onions, trimmed

Method
You need to spatchcock the chicken. To do this cut down each side of the chicken's backbone with kitchen scissors or a sharp knife (discard bone of reserve for stock). Turn chicken over and press firmly on the breastbone to open out and flatten. I have actually found it helpful to slightly cut the bone on the non-skin side to help you flatten the bird. It is really important to do this so you can cook the meat more evenly on the barbecue. Score the thickest part of the breasts and thighs.

You can process the marinade in a food processor, however, I find pounding it in a mortar and pestle not only helps me relieve the tension built up from frustrating real estate agents, but it also produces a far richer flavour. Place thyme, garlic, cayenne pepper, lemon rind in your mortar and pestle and pound to your heart is content…or until you have a coarse paste. Place peppercorns in a spice grinder and grind. Add the white pepper, lemon juice and olive oil to your paste, mix together.

Pour marinade over chicken, rub into every little crevasse as the lemon will start the cooking process and make your meat lovely and tender. Cover with plastic wrap and leave to marinate in the refrigerator for 2-3 hours.

When ready to cook, drain the chicken and char-grill, turning frequently and basting with the marinade until golden and cooked through. Add the spring onions to the hot plate at the end and char-grill for about 2 to 3 minutes until wilted. The spring onions are a fantastic edition to any barbecue.

The char-grilled chicken with spring
onions on top
Corn salad with buttermilk dressing
I doubled this recipe for 10 people

Corn salad with buttermilk dressing
Ingredients
3 corn cobs
olive oil
1 baby cos
1 cup mint, roughly chopped
1 bunch asparagus, trimmed and blanched
1 punnet cherry tomatoes

Buttermilk dressing
100 ml buttermilk
2 tbsp sour cream
2 tbsp mayonnaise
50 ml lemon juice
1 tbsp sherry vinegar
1 small garlic clove, crushed

Method
Get your barbecue on so you can cook the corn and allow it to cool before you do anything else.


Once corn is cool enough to handle, cut the kernels from the cob and please in a bowl. Separate and coarsely tear cos leaves, add to corn along with cherry tomatoes, asparagus and mint.

To make the dressing, whisk all ingredients in a bowl until smooth, season to taste, refrigerate until required. Just before serving the meal, drizzle a little of the dressing over the salad, tossing to combine. Leave the rest in a dish for people to add more if they like.

The best part...we even got leftovers the next day.

Char-grilled chicken and salad leftovers

28 December 2010

Turkey with saffron butter and preserved lemon & olive stuffing

The table was set...

Table awaiting its guests on
Christmas Eve
the turkey was cooking...

Turkey roasting in the oven for
close to 4 hours
Dean, Frank and Sammy were singing Christmas tunes and my spirits were soaring high. Christmas Eve had arrived and I was cooking my very first Turkey for my beloved, in-laws and parents. It doesn't get much better than this.

The day was planned with tactical scheduling brilliance...and this is saying a lot considering I'm one of the world's most unorganised individuals. I had cookies to finish baking for the christmas hampers, hampers to pack and wrap, a turkey to pick up from the butcher and get in the oven by 3pm, along with a little cleaning and a table setting to complete. Thank goodness for a helping hand from my beloved.

Now, back to the turkey.

I have wanted to cook a turkey for over 12 months. But, due to a little unexpected accident last year resulting in a broken wrist, I had to cancel my turkey order and wait for another year. This was my year. And this is the recipe:

Turkey with saffron butter and preserved lemon & olive stuffing
from the 2009 edition of delicious christmas

I used a 4.8kg turkey, although the below is for a 7 - 8 kg turkey I still kept the measurements the same.
2 tbs milk, warmed
1 tsp saffron threads
3 garlic cloves, finely chopped
150g unsalted butter, softened
1/3 cup (115g) honey
3 tbs dukkah (purchased from gourmet food shops, or just use some sesame seeds)
2 red onions, quartered
2 tbs olive oil
2 tbs plain flour
300 ml chicken or turkey stock
100 ml dry red wine
2 tbs quince paste (I used some left over Maggie Beer cabernet paste)
2 tsp balsamic vinegar

Stuffing
1 tbs olive oil
2 tbs unsalted butter
1 white onion, finely chopped
2 garlic cloves, finely chopped
1/2 cup (125 ml) chicken stock
5 cups (350g) fresh white breadcrumbs
1/2 a preserved lemon (available from gourmet food shops), white pith removed, finely chopped. (The pith is the white 'stuff' underneath the zest, or yellow skin of the lemon)
1 cup pitted green olives, chopped
I added 1 cup of dried apricots to add sweetness, chopped. Prunes would also go nicely in this.
1/2 cup finely chopped flat-leaf parsley

Stuffing method
Make your fresh breadcrumbs by using stale or lightly toasted bread. Put it in a food processor. Don't mix it too much as it's nice to have chunks of bread in stuffing. If you have gluten free guests, don't think they will have to miss out on the best part of this roast, use fresh gluten free bread...it works just as well.

Heat oil and butter in a pan over a low heat. Add the onions and cook for 2-3 minutes until soft. Add the garlic and cook for 1 minute. Add stock, bring to the boil, then remove from the heat. Combine the breadcrumbs, lemon, olives, apricots (if adding) and parsley in a large bowl. Add the stock, season and stir to combine. Add extra stock if you think it's too dry or add an egg to help bind the stuffing together (mine didn't need the egg). Cool completely before stuffing the turkey.

Turkey preparation
Preheat oven to 170 degrees celsius.

Place the milk and saffron in a small bowl and set aside for 10 minutes to infuse. With a hand mixer beat the saffron milk and garlic into the softened butter. This will take a little while, but persist, this is what will keep your turkey meat delicious and moist.

Now it is time to get into that turkey. Just like the duck from the other day, you have to suck up the potential horror you feel at sticking your hand inside this animal and pull out the giblets (and neck if that hasn't already been removed). Once this is done rinse the turkey, then dry it inside and out with a paper towel. It is time to fill the cavity with the delicious stuffing - don't overfill it though as stuffing expands during cooking. I skewered up the hole, once stuffed. Next time I would also tie the legs together for a better look.

Grab your prepared saffron butter and have it next to you. Next you need to work your fingers gently between the breast meat and skin of the turkey, taking care not to tear the skin. It is pretty tough so isn't too easy to do, but be gently all the same. Push half the saffron butter in between the skin and breast meat, rub remaining butter all over the outside of the turkey.

The recipe now recommends you wrap the bird in a 2-metre square of muslin. However, I don't have muslin, so I dialed-a-chef (aka Dad) and he said just cover the breast in aluminium foil and wrap it under its wings and legs. Check out the photo above and you can see what I did. This technique worked perfectly. Roast the turkey for 3 hours.

Discard the aluminium foil (or muslin) and brush the turkey with honey. This adds a wonderful sweetness to the skin. It will become dark from the sugars, don't think you have burnt it. Sprinkle with the dukkah. Add the onions to the pan and roast for a further 30 to 40 minutes. Remove onion and turkey from the pan. Transfer the turkey to a tray to rest.

Gravy method
First, I want you all to throw that gravox tin out...you don't need it to make fabulous - and EASY - gravy. Remove some of the fat from the roasting dish, leaving the pan juices behind. If you have a stove top roasting dish you can place this on the element, or if you are like me and have the world's worst roasting tray, place the pan juices into a fry pan; but make sure you take all the yummy burnt bits and left over onion pieces. These will add flavour.

Place the pan over a medium heat, add the flour and cook, stirring, for 1 to 2 minutes. The trick here is to use a whisk, only use a whisk, this will prevent you from getting lumps in the gravy. It is important to cook this part for probably closer to 2 minutes. This will cook out the taste of the flour.

Add the stock, wine, quince paste and vinegar. Cook, stirring (whisking), for 2-3 minutes.

Place turkey on a platter, serve with gravy, roast potatoes and steamed vegetables.

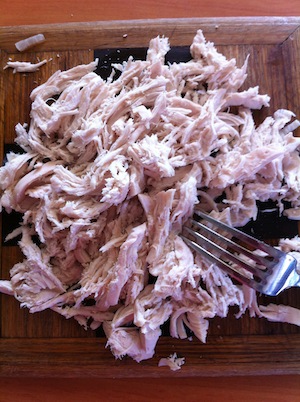
Not the best photo of the turkey,
but it tasted delicious.
This recipe was extremely tasty, and I'm VERY proud to say, the breast meat was exceptionally moist. Certainly a recipe to add to your special occasion dinners' list.